
For years I’d been wanting to try an Ultrawide monitor. I had a 27″ 1440p Chinese import brand that did the job quite nicely at home, and two 24″ screens in the office but there’s something alluring about a single giant pane of ‘glass’.
I also had apprehensions which put me off buying one. Was one giant screen better than two for me? Everyone’s different, but I liked the idea of having a centre of the two screens you can look at for ergonomic reasons – not possible with two 24″ screens unless they’re stacked (which then presents other ergonomic problems of having to look up), or one in the centre and one off to the side. Alternatively, the single 27″ screen didn’t have this problem, but had less screen real estate; I couldn’t really run two windows side by side without it feeling awkward due to the resulting shape appearing squished.
I didn’t know if it would just be too weird having a stretched screen. Going from the old 4:3 ‘square’ screens to 16:9 wide screens seemed much more logical, but was this over the top?
Lenovo came to the party as part of their Lenovo Insiders program and gave me a ThinkVision P44W-10 to try. A 43.4″, 32:10 HDR, FreeSync monitor. Awesome! I really wanted to see if it was usable for work and home, and if I had to change my ways for the better or worse to accommodate the vast difference in screen.
If you want the pure specs, here they are from Lenovo:
Monitor Specifications
| Dimensions | Height | 269.8 mm (10.62 in.) |
| Depth | 461.1 mm (18.15 in.) | |
| Width | 1058.3 mm (41.67 in.) | |
| Panel | Size | 43.4 in. |
| Backlight | LED | |
| Aspect ratio | 32:10 | |
| Stand | Tilt | Range: -5° ~ 22° |
| VESA mount | Supported | 100 mm x 100 mm (3.94 in. x 3.94 in.) |
| Image | Viewable image size | 1102.36 mm (43.4 in.) |
| Maximum height | 351.43 mm (13.84 in.) | |
| Maximum width | 1052.66 mm (41.44 in.) | |
| Pixel pitch | 274.05 um (10.79 in.) | |
| Power input | Supply voltage | 100-240V AC |
| Max supply current | 3A | |
| Power consumption Note: Power consumption figures are for the monitor and the power supply combined. | Normal operation | <250 W (max) |
| <70 W (typical) | ||
| Standby/Suspend | <0.5 W | |
| Off Note: without USB/webcam/external/spea ker | <0.5 W | |
| Video input (DisplayPort) | Interface | DisplayPort |
| Input signal | VESA TMDS (Panel Link™) | |
| Horizontal addressability | 3840 pixels (max) | |
| Vertical addressability | 1200 lines (max) | |
| Clock frequency | 720 MHz | |
| Video input (HDMI) | Interface | HDMI |
| Input signal | VESA TMDS (Panel Link™) | |
| Horizontal addressability | 3840 pixels (max) | |
| Vertical addressability | 1200 lines (max) | |
| Clock frequency | 600 MHz | |
| Video input (Type-C) | Interface | Type-C |
| Input signal | VESA TMDS (Panel Link™) | |
| Horizontal addressability | 3840 pixels (max) | |
| Vertical addressability | 1200 lines (max) | |
| Clock frequency | 720 MHz 600 MHz | |
| Communications | VESA DDC | CI |
| Supported Display Modes | Horizontal frequency | 30 KHz – 178 KHz |
| Vertical frequency | 48 Hz – 144 Hz | |
| Native Resolution | 3840 x 1200 at 60 Hz |
Shipment Group
- Monitor with stand and base
- Power cable
- USB 3.1 Type-C Gen2 cable
- DisplayPort 1.4 Cable
- HDMI2.0 cable
- USB 3.1 Gen1 Type-A to C cable
- Harman Kardon™ certified speaker
- Color Calibration Factory Report
- Quick setup guide
Here’s also some great reviews: Storagereview, Anandtech and TheVerge. It’s worth noting that Lenovo also released a Legion Y44w Gaming Monitor with identical specs, but a different chassis around the monitor – so pick whichever you like the look of more, or can get cheaper.
A giant box turned up, bigger than I expected. The monitor itself measures 41.5″ wide (ignoring the curve) and it felt a bit comical taking it out of the box, like holding an oversized novelty item… but mixed with holding something that was purely impressive in it’s size.

I immediately set it up, which was just a matter of attaching the base to the monitor itself, plugging in power and a USB-C cable to a ThinkPad X1 Yoga. It worked, which was the first relief of opening up any new high end device. This photo gives some idea of the scale of this single screen, compared to a 14″ laptop.

It’s hard to not be dazzled by it, especially if you haven’t dealt with ultrawide screens before; as I heard comments of ‘that is impressive’ and just a plain ‘wow!’ setting it up.
I was thinking of setting it up on my desk at work, but instead decided to take it home.
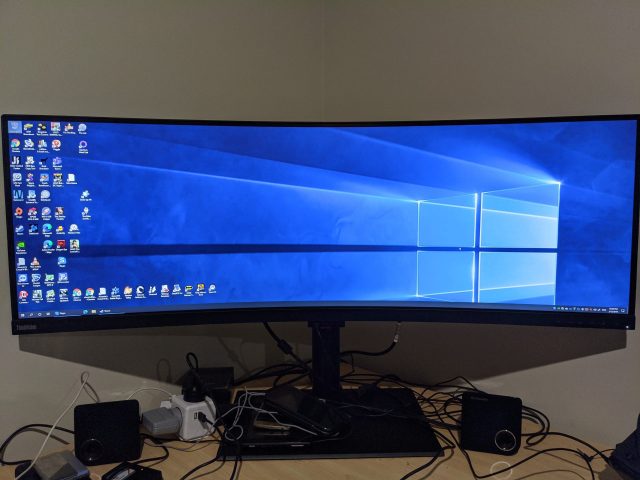
I removed the 27″ and 24″ monitors I had in place, and replaced it with this screen. I was still wondering what I’d signed up for and if it was too big:
I should mention the connection options; we have two USBs, a USB-C 10G port, DisplayPort. another USB-C port but 5G, and two HDMI ports.

I started with the USB-C 10G port thinking that was the best choice, but after some reading up and research changed to the DisplayPort. I wanted to try AMD’s FreeSync technology (which when plugged into a supported graphics card, greatly reduces problems in gaming like screen ripping, lag and out of sync issues), and it supported the highest resolution over DisplayPort as per AMD’s page:

Also note that AMD recently changed the name from “AMD Radeon FreeSync 2 HDR” to “AMD FreeSync Premium Pro” but it’s the same thing.
While setting up I discovered a part of the monitor that pops down in the centre middle to provide a headset jack and two USB 3.1 ports. I then ran a USB-C cable from the computer to screen to connect these up as it’s quite handy to plug these in and access from the front for ad-hoc devices.

I also wanted to check the monitor was on the latest firmware before I played with it too much – and yes, the monitor has firmware you can upgrade. It wasn’t too hard to do following this official guide.
The stand it’s on is also height adjustable purely by pushing up or down on the monitor itself, and I haven’t had it slide down without me making it. The base is quite heavy and large, but flat so you don’t really lose desk space when things can be placed on it.
There was also a piece of software availalable (optional) that supported the Thinkstation P44-W called Lenovo ThinkColor. As per the download page, this software does the following things:
- Display information and basic settings
- Scenario modes selection, adjustment and customization
- Color adjustment, including color gamut and color temperature with preview
- Quick pivot to rotate display direction
- Print assist to design in real size
- AppThink to automatically apply different color settings on different applications
- Desktop partition for easy and customizable multi-tasking
- PBP and PIP management for supported models
- Customizable hot key
- Adjustment supports multiple displays
The most useful feature beyond general configuration options (like enabling/disabling HDR) is the Desktop partition function. You’re able to select how you’d like to divide up your screen from the 11 options available (or customize). When dragging a window, you can drag and drop onto a section of the screen that shows a copy of the desktop partition you chose below, and it’ll snap the window to that size. This means you can quickly and easily move windows around to your preferred layout, without trying to constantly size them. If you just want a left and right option right down the middle, Window 10’s native snap options work a treat, but for anything else this is ideal and just as easy.

Also yes, the montior supports HDR. HDR in Windows 10 is worth looking into to understand more: https://www.pcmag.com/how-to/how-to-play-games-watch-videos-in-hdr-on-windows-10. I mucked around with the option and tried to find some videos to show off HDR, but of course finding a video that extends the entire screen and with HDR isn’t an easy feat, so I made do with this:


HDR in Windows 10 isn’t the best experience – maybe it was something I was doing wrong, but I would only toggle it on for games or movies. General usage seems to be affected in some scenarios, a white background gets greyed out. That’s nothing to do with this monitor as I found a lot of info online about other people with the same problems – but, as I went to re-test it while writing this, and re-Googling the problem, it looks like it’s been fixed. Unsure if it was an AMD or Windows issue, but there’s a giant thread here about it along with plenty of others; so now, I’ll leave HDR on.
Here’s what the problem looked like when I was first testing:

Now, it’s not an issue. If you do enable HDR in Windows 10, make sure you adjust the slider for SDR content to your liking (I changed it from the default 50 up to 60):

There’s also another option where you can plug two devices into the monitor at the same time, and split half of the monitor off to different ports – so one PC might be on HDMI1, and the other DisplayPort, and the single screen acts like two separate screens. I thought that was a handy feature if you need to work on different physical devices, as you can flick back and forth between split and single. That’s called PBP – Picture by picture, and there’s also PIP – Picture in Picture which works in a similar way, but overlays one over the other.
Work wise, I RDP a lot. I was a bit concerned how that would work on this monitor, but I usually end up having a single RDP window in the middle of my screen running at 1920 x 1080 resolution. and have something like Twitter via Tweetdeck on the browser behind it full screen – so the first few and last few columns are always visible. I’ve also not run out of screen when using Micrsoft Azure, well known for using a lot of wide screen real estate.
If I need a dual screen setup, snapping one window to the left and the other to the right results in two 1920 x 1200 screen – which is plenty and replaces the function of having two screens quite well.
After checking all that out. it was time to try out some games. First up I picked Rocket League just to check out the field of view, and wow can you see a lot:

Of course about two minutes into this, my eldest son wanted to have a turn, and insisted in playing his favorite game at the time, Goat Simulator:

As part of writing this post, I *had* to play a few rounds of Call of Duty Modern Warfare to continue to show off that field of view. I streamed one round to Facebook Live and got 4th, not bad without a warmup:
Here’s a few screenshots in game at the full 3840 x 1200 resolution (10mb photos full size):


It quite honestly makes a huge difference. Instead of focusing on the entire screen at once, it’s impossible at this size, so you start using your peripheral vision more and glance around rather than purely moving your view with the mouse.
So, as I write this review with WordPress in full screen and huge amounts of white space I find that I like it. I use this when I want to focus and not be distracted, because if it was any smaller then I’d see what was behind it – other open windows, or a desktop with colourful icons. I also usually have a bunch of tabs open like we all do these days, and can actually see what they all are when it’s full screen :)

It took me maybe a week or two, but it has easily become the new norm. Slightly jarring at the start, but I can strongly recommend going ultrawide. 34″ was the original size I was looking at, but now I feel that would be a bit small. Probably the same way we all now have 55″+ TVs and can’t imagine watching TV on a smaller screen than that, which again shows how quick we adapt to bigger screens.
I haven’t got any other ultrawide monitor to compare the Lenovo P44W-10 but I’ve had no issues with this one. As you’d expect, a monitor should just work – and it does. Ultrawide seems to have reasonable gaming support too these days, so it wouldn’t surprise me if this becomes the new norm, replacing the current norm of dual screens.