Many vendors and companies still transfer data via FTP. It could be transactional data, user data, or a myriad of other things. Hopefully they’re using SFTP or FTPS (which are different ways of achieving secure FTP transmissions) rather than FTP, for similar data transfer security reasons on HTTP vs HTTPS.
A common use case I come across, is user management. Uploading basic user data like names, email addresses and employee numbers so a vendor can update records in their cloud based product for your staff to use. If you’re using a cloud service and don’t have user automation sorted – then ask them how you can achieve it – it’s much more enjoyable to set up automation, than do repeating mindless tasks.
Assuming you have details on what to send and where, you’ll need to work out how to automate FTP uploads. Note that this is a much less secure method – you’re saving the password in plain text. Alternatives do exist such as what’s demonstrated in this YouTube video below using a Public Key and Private Key Pair, but require the ability to create a .ssh folder on the FTP server. I’d rather do it this way:
Getting the other end to do what you want isn’t always possible in the real world, so you need to consider the risks if you need to save a password in plain text somewhere (saved in a Scheduled Task as you’ll see below). They’re obtainable if someone can get onto the server (or a backup of the server, or connect to Task Scheduler remotely), which should be heavily locked down anyway, and the password for this might be saved in a password database those same staff members have access to anyway.
If those credentials were obtained by another party, what could they do? If the FTP site cleans up the data instantly that’s uploaded, then they could potentially upload whatever they wanted. Look at a worst case and decide if you’re comfortable with having the account credentials saved this way, or need to find another approach.
Again, consider these risks, try to implement the most secure method you can, and raise any concerns with management/your boss. Assuming this is a scenario where you can’t do it more securely:
Instructions
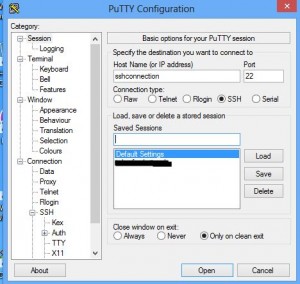
First, you’ll need software. I use PSFTP – part of PuTTY, a free and open source solution. Download the full installer, as there’s a few components of PuTTY we need.
Next, you’ll need the login details of the FTP site:
Host: e.g. sftp.contoso.com
Username
Password
Open a Command Prompt, navigate to the location that contains sftp.exe and type:
sftp username@host -pw password
You’ll probably first be prompted with a message saying ‘The server’s host key is not cached in the registry’ with some details on the fingerprint. If you’re sure you’re connecting to the right server, you can say ‘y’ to ‘Store key in cache’. Once saved, you won’t be prompted for this on the same computer/user.
At this stage, we’re just making sure you can sign in and get past the key stage. If this works, you’ll now need to work on a batch file to pass through all the commands you want to do.
In this example, I’ll be going into a folder and uploading a file. Open notepad and type your commands, which you can first test in your active connection:
cd inbound
mput filename.csv
quit
Pretty simple stuff. Save your notepad file (we’ll call it batchfile.txt), and if you haven’t already disconnected from your SFTP session, do so with the ‘quit’ command.
Connect back to the SFTP site, but this time we’ll specify the batch file to rin after connecting:
sftp username@host -pw password -b batchfile.txt -batch
I’ve also added -batch on the end to specify it’s an automated batch job – this will cause SFTP to exit on a prompt, rather than be running forever waiting for an input. You can try without -batch first if you want to test and see the prompts, but you’ll need to run this command manually rather than triggering from a Scheduled Task.
If this works as expected, great! You can automate the SFTP task – the final step is to schedule it to run, which I usually use the native Scheduled Tasks in Windows to do.
If your scheduled task is running under a different account than what you tested with, then you’ll need to do that initial host key saving – easiest way is to launch Command Prompt as that user, and connect to the FTP site.